Industrial micro-computed tomography (micro-CT)

At Fraunhofer IKTS in Dresden, industrial micro-computed tomography (micro-CT) is an established analysis method for component inspections and small series testing. However, it is also becoming increasingly important in the examination of artistic and cultural goods. Micro-computed tomography is an ideal X-ray CT method for detecting inclusions, cracks, pores and other material inhomogeneities within an arbitrarily shaped object and thus for performing pore analyses, void analyses, dimensional accuracy or completeness analyses. Micro-CT enables non-destructive three-dimensional inspection of objects with a high spatial resolution.

The X-ray CT device set up at Fraunhofer IKTS can be adapted to the respective customer-specific requirements. Thus, very small components, for example from electronics, as well as large objects, such as components from the automotive industry but also art objects or fossils, can be examined.
Measuring principle

© Fraunhofer IKTS
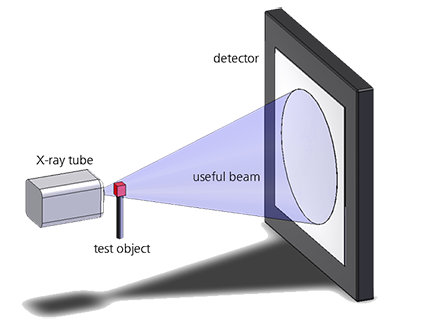
Functioning of industrial micro-computed tomography (micro-CT) for component inspection and small-batch testing.

The test object is positioned on a rotation table between the X-ray tube and the detector so that it can be completely or partially transilluminated (RT, DRT). During computed tomography, the rotation table rotates 360° with the specimen. During the rotation, approximately 1000 projections are recorded from different orientations.

From these data, a 3D X-ray data set is calculated for evaluation. The volume data set represents, as a first approximation, the spatial mass density distribution of the sample. Within the 3D volume data set, sectional views can be placed in any orientation. This allows for a precise evaluation of the specimen with respect to its internal structure (pores, cracks, inclusions, material inhomogeneities, etc.).

The generated 3D volume data set also allows for geometric measurement of distances, angles, circular arcs and surfaces or the determination of partial volumes of differently dense areas, which manifest themselves in different gray values. The documentation of the X-ray CT examinations takes place in the form of sectional images or 3D animations in the standard formats TIF, JPG, AVI or MPEG.

© Fraunhofer IKTS
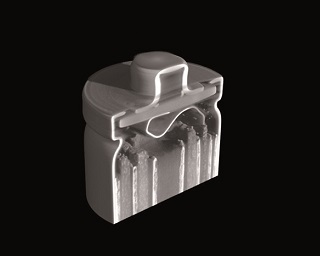
X-ray CT of a battery to detect cracks.
© Fraunhofer IKTS
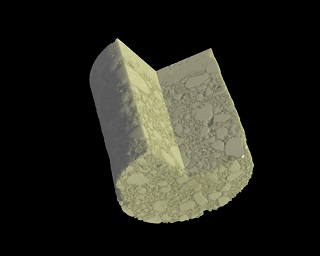
X-ray CT of a concrete drill core for pore analysis.
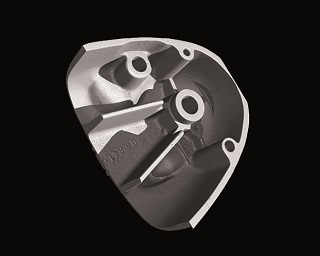
Innenseite eines Getriebedeckels vor schwarzem Hintergrund
© Fraunhofer IKTS
Surface data for dimensional accuracy analysis of aluminum die castings using micro-computed tomography.
© Fraunhofer IKTS
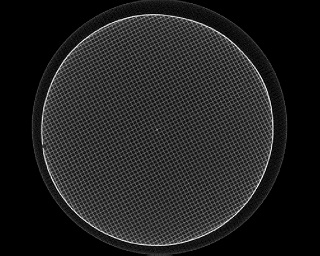
X-ray CT of a ceramic filter structure.
© Fraunhofer IKTS
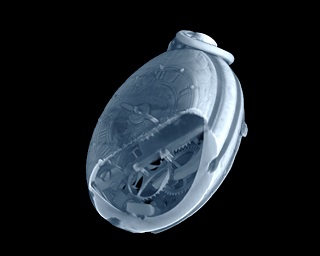
X-ray CT of a single-hand neck watch for imaging internal structures.
© Fraunhofer IKTS
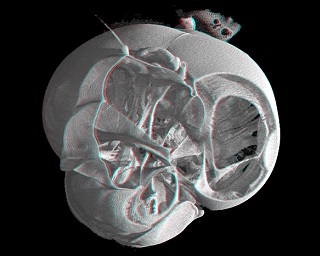
X-ray CT of a dragonfly head for bio- and medical-technical analyses.

Fields of application
 

  • ­Electronics (flat modules)
  • ­Machine components, e.g. die casting
  • ­Ceramic industry
  • ­Bio- and medical technology
  • ­Archaeological finds and art objects


Technical details
 

  • ­225 kV microfocus X-ray tube
  • ­2048 x 2048 pixel area detector
  • ­Maximum real resolution: > 900 nm/Voxel
  • ­Maximum sample size: < 600 mm (largest dimension); for tests of sections also larger
  • ­Maximum sample weight: < 6 kg


Services offered
 

  • ­Non-destructive component inspection and small-batch testing
  • ­Completely reconstructed data set in the desired format
  • ­Support in the use of the data viewing software
  • Individual evaluation of the measured data