Optical test systems and diagnostics

Products and services
One stop shop – from service to inline system
Whether service, laboratory device, or fully automated inline system: Fraunhofer IKTS provides entire measurement and test systems – from the supply of functional sensor systems to the design and manufacturing of customized system components (detectors, electronics, signal processing), development of algorithms and software up to on-site integration.
- Industrial measurement and test systems
• Structure analysis of ceramics by means of optical coherence tomography
• Automated thickness measurement of tapes by means of optical coherence tomography
• X-ray line detector L100 – direct-converting, counting x-ray detector
• 3D dosemeter for the detection of high-energy radiation
• Optical spectroscopy for chemical analysis and stress measurement
• Laser Speckle Photometry for inline quality assurance
- Product labeling
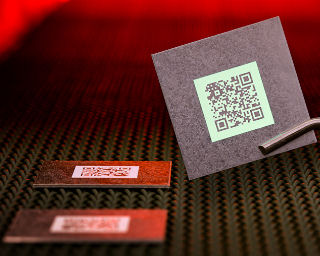
• CeraCode® – component tracing in metal processing
- Medical diagnostics and sensors
• OCD – rapid and reliable diagnosis of prostate tissue
• SteriHealth – sterilization proof of medical products
Industrial measurement and test systems
Structural analysis of ceramics by means of optical coherence tomography
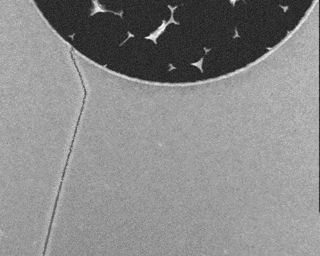
Optical coherence tomography (OCT) applied for visual 3D testing provides high-resolution information on scattering intensities in various materials, like ceramics, plastics, glasses, glass fiber-reinforced plastics or biological materials. From signal imaging, a wide range of quality parameters can be extracted.
This contact-free, highly resolved and quickly working measurement method is especially suited for the structural analysis of ceramics. With the aid of OCT, for example, pore sizes and web thicknesses of ceramic foams can be determined or structural defects, like cracks, pores or dents can be automatically detected.
Compared to existing methods, OCT is characterized by a continuously high accuracy under industrial conditions (vibration, dust, highly smooth and transparent surfaces) and can be applied to the whole production chain.
Further application fields of OCT:
- Foreign object detection in filling processes (fragments, residual liquids, biological foreign objects)
- Strain measurement
- Structural analysis (delaminations, inclusions, cracks, construction of multilayered systems, coatings)
- Surface metrology
For more information on OCT, please contact:
Andreas Lehmann
Department: Bio- and Nanotechnology, Group: Optical Coherence Tomography
Automated thickness measurement of tapes in roll-to-roll processes by means of optical coherence tomography
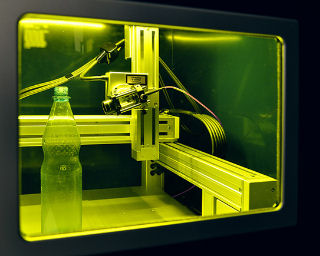
For the automated, production-related monitoring of tape manufacturing processes, Fraunhofer IKTS uses optical coherence tomography and offers a fully automated inline thickness measurement in real-time, which is also available as service and laboratory device. This measurement technology is contact-free, highly resolved and fast. Compared to existing methods, OCT is characterized by its continuously high accuracy under industrial conditions (vibration, dust, highly smooth and transparent surfaces).
For more information on OCT, please contact:
Andreas Lehmann
Department: Bio- and Nanotechnology, Group: Optical Coherence Tomography
X-ray line detector L100 – direct-converting, counting x-ray detector for 100 % inline testing
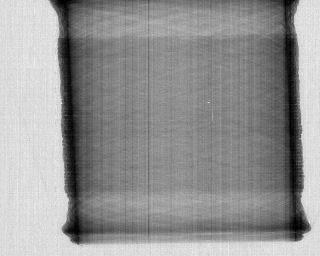
The x-ray line detector L100 solves complex tasks in the area of non-destructive testing at an unmatched quality. It comprises energy discrimination, single photon counting, high resolution as well as flexibility and speed. Besides its actual application – the detection of x-radiation – the line detector L100 can also be adapted to optical testing tasks (process control, sorting, tomography).
L100 is just one of the possible configurations of the sensor system. Other applications include very long as well as curved detectors. Moreover, special configurations can be realized for proving high counting rates.
For more information on the x-ray line detector L100, please contact:
Dr. Peter Krüger
Department: Accredited Test Lab
3D dosemeter for the detection of high-energy radiation
The detection of the high-energy radiation dose (e.g. gamma or electron radiation) on curved 3D-freeform surfaces can be realized with the help of inorganic phosphors. The 3D dosemeter of Fraunhofer IKTS (measurement range 0–250 kGy, dose resolution up to 80 kGy: 1 kGy and from 80 kGy: 5kGy) optically reads out the dose information from arbitrarily formed surfaces with high spatial resolution.
For more information on the 3D dosemeter, please contact:
Prof. Thomas Härtling
Department: Testing of Electronics and Optical Methods, Group: Optical Test Methods and Nanosensors
Optical spectroscopy for chemical analysis and strain measurement
The Fourier transform infrared and Raman spectroscopy are suitable methods for the contact-free and non-destructive determination of chemical compositions of sample layer thicknesses, local sample temperatures or mechanical strain. From residual strain measurements and microstructural analyses as well as phase transition analyses in ceramics over investigations of molecular structures, orientations and conformations of polymer chains, and the detection of degradation processes up to strain and contamination analyses on silicon surfaces – Fraunhofer IKTS offers customized solutions for the application in industry at reasonable investment cost.
For more information on optical spectroscopy, please contact:
Measurement services: Dr. Daria Kovalenko
Device construction: Prof. Thomas Härtling
Department: Testing of Electronics and Optical Methods, Group: Optical Test Methods and Nanosensors
Laser Speckle Photometry for inline quality assurance
The laser speckle photometry (LSP), developed by Fraunhofer IKTS, is a contactless, inline-capable and cost-effective method. It is suitable for the time- and spatially resolved characterization of material properties, for monitoring mechanical stress changes, for the detection of surface defects, for process monitoring and for geometric measurement. In addition to traditional metal and non-metal materials also composites and organic substances are investigated.
LSP evaluates the temporal variation of the speckle patterns (interference patterns), which are connected via different parameters with mechanical and structural properties of the component (porosity, residual stress, hardness, roughness, degradation, inhomogeneity) and which are physically coupled to the change of the thermal conductivity of the material structure.
Fraunhofer IKTS offers the LSP for application in the following areas:
- Inline quality assurance in production areas with high quantities
- Development of customized LSP-based complete test systems
- On-site measurement service
- Process monitoring (e.g. porosity/defects in additive manufacturing, monitoring of biotechnological processes)
- Stress monitoring of large components with fatigue stress (structures, bridges)
- Defect detection for almost all classes of materials
- Geometric measurement of electronic components
For more information on LSP, please contact:
Dr. Beatrice Bendjus
Department: Testing of Electronics and Optical Methods, Group: Speckle-Based Methods
More information

Privacy warning
With the click on the play button an external video from www.youtube.com is loaded and started. Your data is possible transferred and stored to third party. Do not start the video if you disagree. Find more about the youtube privacy statement under the following link: https://policies.google.com/privacyProcess monitoring with Laser Speckle Photometry – fast, accurate, non-contact, non-destructive
Product labeling
CeraCode® – component tracing in metal processing
The individual labeling (direct part marking) of heat-treated components in metal processing poses some challenges. In order to meet constraints defined by both materials and processes (high temperatures, coated surfaces), Fraunhofer IKTS developed the CeraCode® labeling technology based on robust ceramic luminescent materials. The technology allows for tracing components over the entire process chain.
For more information on CeraCode® labeling technology, please contact:
Prof. Thomas Härtling
Department: Testing of Electronics and Optical Methods, Group: Optical Test Methods and Nanosensors
More information
Medical diagnostics and sensors
OCD – rapid and reliable diagnosis of prostate tissue
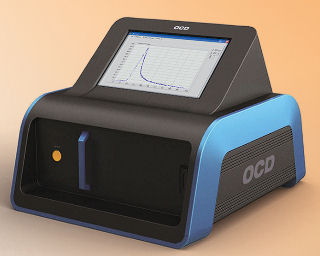
OCD is the acronym for Optical Cancer Diagnostics. With the help of an optical analysis device developed at Fraunhofer IKTS, physicians are able to reliably decide within one and a half minute whether a carcinoma exists.
Analyses are based on the auto-fluorescence of human tissue. A dosed laser pulse excites fluorescent molecules in the tissue, so that these emit light on their part. The decay of fluorescent radiation differs for healthy and malignantly altered tissue. This device analyzes automatically the behavior of fluorescence decay and classifies the obtained sample.
After two successful clinical studies, the optical diagnostic device is currently running through a third study.
For more information on OCD, please contact:
Andreas Lehmann
Department: Bio- and Nanotechnology
SteriHealth – sterilization proof of medical products
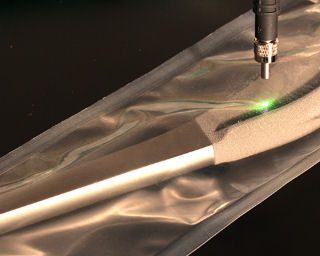
A novel optical control system facilitates the indirect validation of electron beam sterilization.
With SteriHealth, Fraunhofer IKTS offers a reliable control tool for the sterilization of product or packaging surfaces. In contrast to conventional sterilization monitoring techniques (e.g. film dosemeters), no subsequent evaluation is required and the results can be obtained immediately after sterilization. Hence, successful sterilization as well as further process information can be traced prospectively along the whole supply chain.
This spatially resoluted control regarding the quality of the irradiation also allows for a specific post sterilization of food or medical products.
For more information on SteriHealth sterilization proof, please contact:
Prof. Thomas Härtling
Department: Testing of Electronics and Optical Methods, Group: Optical Test Methods and Nanosensors
